Saturday, October 12, 2013

Cookiemon

I think I've mentioned this before, but Karen found a small group of people around our age that play board games every week. This week we hosted and I wanted to make something tasty and also super nerdy. Both of those criteria were met in full when I found a recipe on youtube for PokeBall cookies. As it turned out I used the idea from the video and a sugar cookie recipe from my very favorite-est food person, Alton Brown.

Ingredients!
The sugar cookies came together very quickly even though my butter was not quite as softened as it should have been before creaming together with the sugar. In the mean time I sifted together the flour, salt, and baking powder. After the butter was well creamed and light, fluffy, and pale yellow, I added one egg with some milk. I believe it was a tablespoon, but I'll post the link to the recipe and the youtube video at the end of the post.

Light and fluffy.
I love these tiny glass ramekins for everything when i'm cooking.
After the egg and milk mixture was incorporated I added a teaspoon of vanilla extract. The recipe does not call for it but I enjoy a bit of vanilla in any cookies I make. After mixing the vanilla in for another 30 seconds to a minute, I began to slowly add in the dry ingredients. Be sure to scrape down the sides between adding new ingredients so you make sure everything gets incorporated. If you're like me and always discover that you've dropped a bit of flour over the side of your mixer, don't worry. It'll still turn out fine. Mix your dough until it comes together and pulls away from the side of the bowl. Split the dough into halves and color one half red. Be smarter than me and don't try to mix the color in by hand. It takes forever. Roll into logs, wrap in plastic, and place in the fridge for about an hour.

It's lo-og! It's lo-og!
After your cookie dough logs have firmed up, remove them from the fridge and slice down the center, splitting them into half moon shapes. Stick a red half to a white half. You can use water or egg wash to seal the two halves before you re-wrap in plastic and stash in the fridge for another hour.


I am very happy these stuck together.
After your cookie dough has chilled for another hour or so slice off rounds. Remember to use a circle cookie cutter to make a nicely rounded shape. I didn't. I still think they looked good. Bake the cookies for 7-9 minutes, or until the edges are just browning, in a 375 degree oven. Let the cookies cool, then ice the cookies with a black line across the seam where the red and white mix and a black circle in the middle of the cookie. Top the black circle with either a small white round candy like smarties, or with a mini marshmallow cut in half.

Don't try to carry more than 6 cookies at once!

All that's left now is to enjoy! Maybe pretend it's still back in the day when the first games came out, too.


Bye!

-R

http://www.youtube.com/watch?v=4rLCwWl_Gyc <- The YouTube video I got the idea from.

http://www.foodnetwork.com/recipes/alton-brown/sugar-cookies-recipe/index.html <- The sugar cookie recipe from Food Network


Wednesday, October 9, 2013

Steaks, sans grill.

Sometimes I have conversations with my wife, and halfway through I realize I have stopped making much sense. Such was the case when Karen told me that she wanted to have steaks and I momentarily forgot that I was in control of making that happen.

Since I often have less working time than she does, I have taken to doing a lot of the menu planning and cooking. This works out great, because of the fact that I love to cook and love more to be in charge of all of the things that go on while cooking.

Not too long after our wedding, we were up at my mom's lake house near the lake of the ozarks. The weather can be unpredictable in the spring, so we were caught somewhat off-guard by a sudden rainstorm and I had to change from grilling to some other method for cooking the steaks we had purchased at the grocery store on the way in. I'd always read about how good cast-iron was for this particular purpose, but I hadn't really had a chance to try it out prior to this situation being thrust upon me.

While the first occasion was with a ribeye steak, our most recent steak adventure was with a sirloin of some variety that we purchased from target. Forget your fancy rubs and seasonings. For me, the best way to go about adorning your steak is salt and pepper only.

I really should have trimmed them, but a bit of fat is tasty.
After the salt and pepper, on both sides of course, is allowed to sit for a few minutes, and the steaks have come to something near to room temperature, they get placed into a very hot cast iron pan to sear for a few minutes on each side. Contrary to what you may have heard this does not 'seal in juices'. Quite the opposite actually as the increased heat actually does more cellular damage to the structures holding the water and various dissolved elements inside the steak. What it does do is create a flavorful browned layer on the exterior through a process called the 'Maillard reaction'. This is a similar process as what creates the brown crust on breads and baked goods.

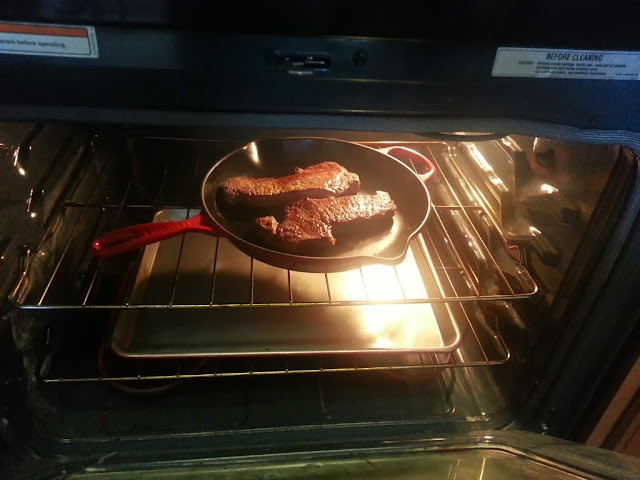
After searing another wonderful advantage of cast iron is revealed when you slide the whole pan straight into a preheated oven. Ours is most commonly set at 350, and the steaks cook for just under 10 minutes. Less if you prefer your steaks rarer than medium to medium well. More time if your steaks are thicker, or you prefer well done.

Into the hot-box! Use oven mitts!
After you remove your by now seared and wonderfully browned and fabulously smelling steaks, make extra sure to let them rest under foil for another 5 minutes or so. This will allow all of the juices that have been concentrated by the heat to redistribute themselves throughout your steak. Cut early, and a pool on your plate will be the result.

I kept the sides simple, as I wanted to make the beautiful steak the star of the show. I steamed some green beans, and sliced up a really interesting looking pretzel bread loaf I found at Whole Foods. Have I mentioned yet how in favor of the whole pretzel bread craze I am? It's quite a bit.

A light grind of salt and pepper for the beans and butter for the bread. A fantastic meal!
Hopefully this will inspire one of you, at the very least, to pick up a not-too-expensive cast iron pan, pre-seasoned please, and try your hand at seared and oven finished steaks.

See you next time!

-R

Wednesday, October 2, 2013

Roasted Hatch Chile Pepper Burgers

I think I may have mentioned before how bad it is that I discovered the fact that whole foods is about a mile away from where I work. On one of the post-work trips for produce, I discovered that it was nearing the end of the season for Hatch peppers.

As far as I can tell, Hatch peppers are grown pretty exclusively in New Mexico and are harvested in late August. The pods are long and slender and are a lighter yellow-green as compared to the dark green of a jalapeno. The heat level can vary wildly between varieties, from mild to extremely hot. I was sort of hoping that the ones I bought would fall more in the middle of the scale, but they turned out to be on the milder side.

Halved chiles being prepared for the broiler.
To start my burgers, first the chiles had to be roasted. Not being in possession of a fancy rotating gas powered roaster myself, I turned to the broiler to get the job done. I've used this method on bell peppers before and it has yielded consistently good results. Aside from the lovely roasted flavor this process brings, roasting chars the outside skin of the pepper making it much easier to remove prior to use. The skin on most chiles, at least the ones I have personally used, is very thin and almost waxy and unpleasant to eat. I peel any chiles I roast. A handy trick for the peeling is to let the chiles steam for 5 to 10 minutes in a paper bag or in a bowl covered with plastic wrap. The steam further loosens the skin.

Roasted chiles, before peeling.
After steaming it is often possible to peel the skin off in one or two large pieces, but often there are parts around the outer edge that are more stubborn. After peeling, I chopped the chiles into about 1/2 inch cubes and mixed them into the ground beef along with chopped onion.

It's at this point that I get to talk about one of my very favorite kitchen toys ever. The burger press.

Burger press and pre-cut parchment paper squares.
Shortly after we got married my wife and I went on a restrained but still somewhat extended shopping trip with some gift cards and other money we received from the wedding. This is definitely in the top 5 of my favorite post-wedding gifts.

The press is adjustable, for one, which means you can make anywhere from 1/4 pound burgers all the way up to 1 pound monstrosities. The parchment squares are especially useful if you plan to make a quantity of burgers and then freeze them for later, though I do also enjoy them just for the ease of handling and transferring the patties between whatever tray you're staging them on and the grill.

One square of parchment goes down on the bottom of the press, then the meat goes on top of the paper, and another paper goes on top of the meat. It's a little parchment paper burger sandwich.

All neat and orderly. Plus it keeps your press and tray clean!
Since we're not currently in a position to use an outdoor grill, due to the joys of second floor apartment living, I once again utilized the services of the panini grill to cook the burgers. Honestly it doesn't do a bad job. I still prefer a propane or charcoal grill, though.

Mmm, chiles.
While those were sizzling away, I simply sliced some more white onion and tomato, and pulled off a few leaves of this tiny head of butter lettuce I found in the produce dept. at target. I'm pretty fond of these tiny heads of lettuce especially for things like sandwiches and burgers.

Any opportunity to show off my knife.
At this point, tragedy struck. I was looking around for the hamburger buns and was shocked to find that they were entirely absent. Luckily I had purchased some small square ciabatta rolls for sandwich making a few days earlier. Crisis averted. Plus they were really good!

The finished product.
Thank you all for reading! Other than the minor snag with the hamburger buns this recipe was a total success. Perhaps in the future I will try again with a slightly hotter pepper. See you next week!

Wednesday, September 25, 2013

Panini Press Quesadillas

When we bought our panini press we also picked up a small book called "Panini" from Williams-Sonoma. I've gotten a few good ideas out of it so far. Usually what will end up happening though is that i'll tweak whatever recipe I decide on so that it fits more closely with what we like to eat and what I did and didn't forget to get at the grocery store.

We eat a fair amount of chicken around here and finding new ways to use it is somewhat of a challenge. Karen and I both enjoy quesadillas, however, so I decided I'd give the recipe a shot as well as making a easy and delicious fresh tomato salsa to go along with it. Plus, it gave me a chance to play with the new Le Creuset grill pan I got from work.


Fits over one burner, pretty convenient.


Firstly, I seasoned the chicken breasts with a chili lime spice rub mixture. I could do with this particular spice rub being a bit hotter, but I like the flavor otherwise. This recipe would certainly work with a simple salt and pepper seasoning,or any taco or fajita seasoning you like. After the grill pan heated up I placed the chicken breasts on and smiled with relief that they barely fit.


I was a little nervous. Didn't know if there would be room for all three.

While the chicken was cooking, I began chopping away on all the vegetation that would be required for my salsa. There's no real recipe to it. I usually just chop up one to two medium tomatoes, 3-5 green onions, using the white and the green part after trimming the ends, 1-2 jalapeños, and approximately half of a white onion. When I'm making salsa for my family's events I will often add roasted red bell peppers. After that, some lime juice and salt to finish off. Sadly with this batch I got a little carried away with the lime juice. Oh well, it was still good.


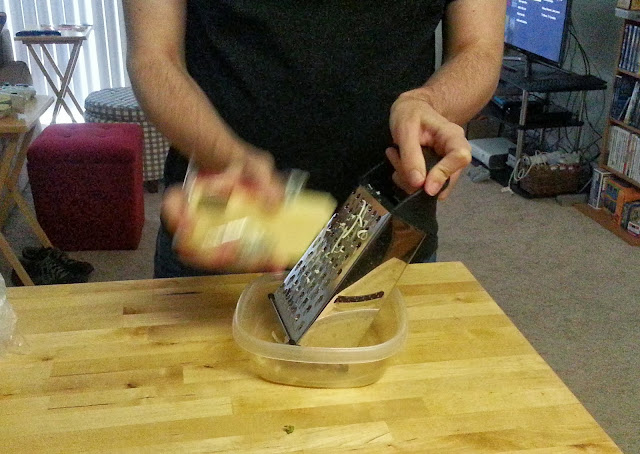
The last little bit of prep to do was grating some nice Jack cheese to go inside the tortillas. Luckily for me I had a lovely assistant to capture action shots of the grating in progress. Exactly what this blog needed. Action. And shots?

ACTION!
The assembly was sort of unique, as the recipe called for you to spread a sour cream and green onion mixture on the tortillas along with the chicken and cheese. In the future i will most likely skip this part and opt to have any sour cream involvement be strictly limited to the outside of the quesadilla device. After a nice sear in the panini press to get those pretty grill lines, I did some quality control and it was so good I forgot to take a picture of the finished product until half-way through. Oops!

The finished product. Half of it, anyways.
I really enjoyed this meal and, even though tweaks were made and further tweaks likely required, will probably do it again. Maybe even with steak!

Super neat tip if you don't have a panini press: Get a clean new brick, wrap it in several layers of aluminum foil like you were wrapping a present, brush with melted butter. Prepare your sandwich or other device to be squished, place said device in a fry pan, heat, and apply brick. Cook until brown on one side, then flip and cook on other side. Easy machine-less pressed sandwiches!

Next week: What happens when Rob finds out that Whole Foods is only a mile away from work? Burgers, apparently.

-R

Tuesday, September 24, 2013

Pops and Pawns

The regularly scheduled post will be up tomorrow but I wanted to make a tiny post to share one of my favorite things about moving back to the north oklahoma city area. Pops.

Pops is a gas station/soda shop/diner/route 66 landmark. It's located in a town called Arcadia. Awesome town name, for one, and an even more awesome giant soda bottle shaped neon sign out front. I've never eaten at the diner, though it is usually busy when we go. This most recent trip it was busier than most, due to some sort of motorcycle show occuring out front.

The big attraction to me is the wide selection of different "pops" they carry in the soda shop portion. Pops carries everything from bizarre novelty flavors like bacon and candy cane, to the slightly out of the ordinary strawberry, grape, peach, and other fruits, to the more standard cola, root beer, and cream soda. There are generally several different brands of each variety to try, and it's hard for me to leave with only one 6-pack of bottles.

The one i'm most excited about is the Leninade.
It's definitely worth making the trip at least once if you live anywhere close. If you are anything like me with regards to trying new and interesting sodas you'll be back multiple times.

-R

Wednesday, September 18, 2013

Sort of kind of toffee. Maybe.

I've started to take goodies almost every week we go over for games, and last week I got it into my head to once again do battle with my ancient nemesis: Sugar cookery. I have a long list of failures cooking sugar behind me. With that in mind, I resolved to try again even if it would mean having to clean up a big pot of black sugar once more.

At least to me, one of the most straightforward things to do with cooked sugar is make butter toffee. You basically take a lot of butter and some sugar, pour it in a pot, cook it to the appropriate temperature, then spread it on a silicone mat and let it cool and harden. Do not let this seemingly easy chain of events fool you, however. Sugar seemingly gets very angry when cooked, and will fight back at every turn.

This is what a pound of melted butter looks like. Mmmmm.
A word about safety; Hot sugar is no joke. Especially as it gets up to the several hundred degrees required to form hard candies like brittle and toffee. If you happen to somehow drip some on yourself, or it bubbles out of the pot for some reason, your first instinct will likely be to put whatever body part now has boiling hot sugar syrup on it into your mouth. Resist this instinct fiercely if it occurs. This is a lot easier if you have remembered to set up a bowl of ice water beforehand. When you plunge even boiling sugar into ice water, it will harden almost instantly, turning it from sticky painful burning into minor swearing and a lump of sugar you can casually pull off.
Seriously. This will be your buddy.

Back to the task at hand. The one major failure I had in my series of events was using too high of a heat. Remember how I said sugar likes to fight you? Give it any excuse and you'll start smelling the horrible smell of very burnt sugar. Since I was using too high of a flame, my butter and sugar didn't get quite to the temperature called for in the recipe before the bottom began to burn. I evacuated the contents onto my waiting silicon mat and was punished for my hubris by only a thin black layer on the pot. Small payment for the goodies to come. Work quickly to spread it out after evacuation, as it will begin to set up as soon as it's off the fire. I used a long metal offset spatula.
The darker swirls are evidence of my punishment.

After it sets up you can either leave it as is, which is totally acceptable if you are only after the sweet buttery goodness, or you can melt some chocolate and pour it over your toffee and let that set up as well before breaking it into shards the size of your choosing. Often the shards will be of the toffee's choosing. Even after being thoroughly cooked, the sugar still has some fight left.

Reminds me of something I saw in an art gallery once.

If you are feeling adventurous you can choose to add nuts, candy bits, salt, spices, or other goodies to the melted chocolate before allowing it to harden. Traumatized as I was by the near disaster, I preferred the chocolate plain.

Next time: Panini Quesadillas with Fresh Tomato Salsa

Recipe used was from the Pioneer Woman website and can be found here: http://thepioneerwoman.com/cooking/2010/12/lias-butter-toffee/

Wednesday, September 11, 2013

This post is a real Pita.

Even though the majority of my food TV viewing these days is in the form of Amazon Prime or Netflix I still manage to keep up a bit at least with some of my favorite chefs. Anne Burrell in particular is fantastically entertaining. The fact that she is rather talented is a nice bonus. When I saw that she was doing a whole wheat pita bread recipe it awakened in me a craving I had not previously known that I had.

The dry goods. I really need to come up with other things to use that whole wheat flour in. Not pictured: wet goods
I decided that I would have to take a stab at this magical food containment device called the pita bread. I am still not entirely sure how it works even after making it. Something about gluten and air and yeasts burping their little gases all over the place i'm sure. Some fun in-progress shots are below. I didn't quite get as many pictures of anything but the dough as I should have. The dough was completely captivating.


After the dough rose for about an hour, I portioned it out into 8 approximately equal pieces and rolled it out to what I believed to be an appropriate size. I'm pretty doubtful that they were the size called for in the recipe. Often when i'm rolling out dough i'll just stop when I decide i'm finished. The results are nearly always tasty!

Eight "equal" pieces. What?

They were super quick to cook once they rested the second time. I was pretty surprised at the amount of browning they took on in just the 6 minutes they were in the oven. They were pretty good though. Not overly wheaty from the whole wheat flour but there was a definite flavor hit from not using only all-purpose. The cayenne was a pleasant addition as well.


I had already decided that the protein for these lovely breads would be chicken, but I didn't do anything specifically fancy except for grill it with a bit of salt and pepper. I did end up making a quick and very easy yogurt sauce though, just yogurt and garlic with a bit of lemon juice. For some freshness and a bit of heat I very roughly chopped up some tomato and red onion. For as simple as it was, I really enjoyed this as a meal, and will definitely be doing it again.


Pita bread recipe from : http://www.foodnetwork.com/recipes/anne-burrell/lamb-burgers-recipe/index.html

Wednesday, September 4, 2013

Labor Day!

I decided that I needed to get a post out about what we did over labor day while the memory was still fresh. Teasing about upcoming posts is just a bonus.

Over labor day we went up to my mother's lake house on the lake of the Ozarks. This house was owned by my grandparents before her and it's a place I've been going to since i was a small child. I'm happy to have had the chance to share it with not only her but also her mother and brother.

We headed up to Tulsa on Friday evening, spent the night, and then left for Missouri the day after. It's a 5 hour drive to get there plus a bit of time stopped for groceries and gas and such along the way. We arrived in the late afternoon to the humid heat characteristic of places near water and set about cooling down the house from sitting unused with the thermostat up since the last visit my mom had made several weeks earlier.

After all the unpacking finished it was time to prepare dinner. We made a pretty typical labor day weekend menu of hamburgers and sausages with corn on the cob. It was rather enjoyable. The next few days followed a simple pattern of waking up whenever we felt like it, playing games, cooking, some light baking, and enjoying the company.

As usual, Karen cleaned up at Ticket to Ride, winning every game we played. There was also a very tense game of Forbidden Island that we somehow managed to win with 6 or 7 of the initial locations remaining. One or two games of munchkin were played as well, being one of our favorites.

Everyone seemed to enjoy themselves, though Karen's brother experienced an acute lack of internet, given that the remoteness of the lake house prevented stable cellular connection. Personally I have grown to enjoy that fact much more than i would have in earlier years. I imagine the prevalence of handheld video games to fill evening board game gaps has something to do with it though.

I doubt we'll get back up there again this year for much more than cleaning, winterizing, and storing the boat. Those tasks are a small price to pay for all the enjoyment we get out of vacationing up there. The only downside at all is that i constantly want to invite all of my lovely internet friends to join me but they are too scattered to make that a viable reality. Perhaps at some point I will be able to organize a grand gathering. Until then, I'll just have to enjoy it with family.

-R

Caprese Pasta Salad!

My wife enjoys pointing out and mocking a time in my life when i claimed to not be picky about food. This was, and remains to be, a huge lie. I have been getting much better though as evidenced by the recent realization that i don't actually hate balsamic vinegar or basil.

After a tasty appetizer-ized (totally a word) caprese salad on tiny toasts made by some friends of ours I decided to combine my love of pasta salad with my new not-hatred of balsamic and basil to create a caprese pasta salad. I think it turned out wonderfully. Do enjoy these pictures.


Here we see what those in the cooking industry, or those in the 'went to culinary school and now just watch a lot of food network' industry, might call mise-en-place. This is a fancy french term for 'get all your stuff together before you start.' The tiny mozzarella balls were surprisingly hard to find until I broke down and went to whole foods. Lesson learned.


I absolutely love bowtie pasta. I think in future pasta salads I will return to rotini or something similar, but bowties always make the food look that much more interesting to me. You'll never take my tiny little neckwear inspired pasta! Never!


A quick halving of the tiny mozzarella balls and similarly tiny tomatoes, and I mixed them with some chopped fresh basil. My only complaint with fresh herbs is that I can never seem to use them all up before some blight or disease or rot claims them. Guess that's an indictment of me, though. Robert Steele, Herb Murderer.

I think I went to highschool with Herb Murderer......


The finished product! I tossed together a balsamic vinaigrette with the oil and vinegar plus dijon mustard, a bit of garlic, lemon juice, salt, and pepper. Lightly dressed, the tiny ties are ready for their closeup. As we enjoyed, I noticed that occasionally the halved tomatoes and mozzarella balls would sometimes stick back together and form an almost perfect sphere. Those were the best bites.

Aside from having to run all over town to acquire the cheese, this was a relatively quick and easy meal to put together. We had a decent amount left over for cold midnight snacking and my wife and I both agreed that we would definitely be doing this one again.

-R

Totally a Reasonable Amount of Time Between Posts.

Quite a few things have happened since we last spoke, fair blog reader. Chief among them is that my lovely wife finally got a job after months of searching! Yay! The villagers rejoiced, and so on.

Offer in hand, we packed up and moved down to beautiful scenic Oklahoma City to start our new lives. Hers as an engineer intern, and mine as a part time kitchen-goods salesman and most-times house-husband, chef, baker, and cleaning crew.

We're slowly rebuilding our boardgame crew, as well as venturing into new and exciting culinary territory. With any luck, there should be one new post a week from now on.

All that having been said and out of the way, let's return to our regularly scheduled program.

-R

Wednesday, February 27, 2013

Pie Charts!

It might seem to you that I haven't been cooking or playing games at all for the last two months.  However, despite all appearances, I've been doing both.  I just haven't written about it.  Here's what I've been doing with my free time:


It's sad 'cause it's true.  

We've managed to do a pretty good job of making a menu plan for the week and then shopping within our budget.  However, the hidden downside of cooking at home all the time is that it feels like we have to clean the kitchen all the time.  I cleaned the kitchen twice yesterday (once after cookies, once after bread) and I just cleaned it again!  It was the dishes from last night's baked ziti.  Here's the (perceived) breakdown:


While we're doing pie charts, here's a very accurate one:

Source unknown - let me know if you know


Saturday, January 12, 2013

The Birds

Guess what!  I got a new cookbook for Christmas!  (Thanks Tracy!)  It's The Science of Good Cooking by The Editors of America's Test Kitchen and Guy Crosby, PhD.  (I heart America's Test Kitchen)

When I get a new cookbook, I look through it from cover to cover.  I'm not really reading it, but I do look at every recipe, however briefly, before I cook anything from it.  As the title suggests, it's not just a book of recipes, but also has a lot of info on cooking concepts and cooking techniques.  It's got a lot about meat, which vegetarians will not appreciate, but I do, since most of my meat cooking experience growing up involved frozen ground turkey.

This book is pretty great.  

For the maiden voyage of this book, I decided to try something new: breading meat. I made Crisp Breaded Chicken Cutlets.  It was pretty involved and required many extra dishes to clean up, but the results were fantastic.  Crispy on the outside, tender and juicy on the inside.  Hmm...sort of like a tardis?  Juicier on the inside?

If you have ever eaten a schnitzel, this was very much like or as a schnitzel.  Actually, according to wikipedia, it was exactly a schnitzel.  Next stop, cream mushroom sauce! That would make it Jägerschnitzel!  I suppose topping it with tomato sauce and cheese would make a chicken parmesan.  Aren't I fancy?

No pictures, my camera is still packed.  Don't judge me!  My suitcase and clothes are unpacked (and washed!), it's just the things in my carry-on.

Now for the other bird in the post: turkey.  Or rather, left over turkey bones from Thanksgiving.  I was making turkey stock!  At home!  How homesteadish!  How self-reliant!  How resourceful!  How stinky!

Yes, it was very stinky.  It's baked turkey, it should smell like baked turkey, right?  Well, it doesn't.  The turkey smell is there, but there is another, less pleasant, gloopy smell.  The results are in the freezer, and considering that it takes at least 10 minutes to thaw a thingy of frozen solid liquid, and that I can't even think about the turkey stock without recalling the unique odor, I don't see myself using it anytime soon.  Do yourselves a favor and stick with boxed or canned broth.  I might make vegetable broth, but I don't think I'll try any more homemade meat broths.

Anyway, don't end this post thinking about gloopy turkey broth.  Recall the wonderful and tasty success of breaded chicken cutlets and of all the wonderful breaded things to come!


Tuesday, January 8, 2013

Red Beans and Rice Stew

And we're back!

Hello, 2013.  I am newly graduated and under-employed, so I have plenty of time for cooking and games.  Hooray!  I was looking through my slow cooker cookbook when Red Beans and Rice Stew caught my eye, probably because one of my stops in my 3-in-1 winter extravaganza world tour was New Orleans.

Just so you know, this post will have no pictures because my camera is still packed away somewhere.

Red beans and rice is traditionally cooked on Monday, because that's when people did laundry.  If that made sense to you, then yay, you have a lot of knowledge about stuff.  If that didn't make sense, google "red beans and rice laundry" and more coherent websites will explain it.  Today is Tuesday, and I really meant to do laundry, so it counts.

This recipe was very tasty, but I ran into two problems.  One was entirely my fault but the other is completely not my fault and I'm not really sure what to do about it.

The first problem was that my 4.5 quart slow cooker was too full.  Phase I (which consisted of soaked beans, liquid, onions, and sausages) filled it up to the brim.  I didn't take a picture (cause my camera is still packed) but I did find a picture on the internets that shows how full it was:

See how full that is?  I don't think food is actually supposed to go all the way to the top...

So what's the problem?  It all fit, didn't it?  Turns out the problem was Phase II, in which our hero adds two bell peppers and half a cup of rice.  It turns out that dinner was not made out of bosons, and so all the things could not occupy the same space at once.  I had to remove a significant amount of cooking liquid to fit in the new things.  This probably contributed to my next problem ---->

Amazing Never Cook Rice!

You know how white rice generally cooks in 20 minutes more or less?  No?  Well, that's usually what it does.  But not today.  Rice was in there for an hour before it was mostly done, and even then there were random crunchy bits.  My theory is that I didn't leave enough cooking liquid in to let the rice do its thing, and also that futzing with the liquid cause the temperature to drop more than expected so things took longer to cook.  

The kicker is that someone recently gave me a 7 quart slow cooker.  If only I had used the bigger pot from the beginning, I could (probably) have avoided all the problems.  Oh well.  Next time, Gadget, next time.  

America's Test Kitchen Slow Cooker Revolution
Red Beans and Rice Stew

Comments: Use the bigger crock pot!

Before I forget, here are some of the games I played over the break:
Kingdom Builder
Flash Point
Medici
Dominion Dark Ages
Dominion Hinterlands
Arkham Horror
Castle Panic
7 Wonders
Elder Sign
Dixit
Tri-bond
Pandemic Mutation 
Pandemic Virulent Strain
Power Grid
Agricola

Yeah, I had fun.  :-)